A good session comes down to a handful of steps done correctly, not luck. Learning how to prepare shisha properly means getting the water level right, packing the bowl so air can move through it, and managing heat so the tobacco cooks instead of burns. Skip any of these and the same tobacco that could have produced a smooth, cloud-heavy session ends up tasting harsh within minutes.
This guide walks through the full setup from equipment to first draw, plus the troubleshooting most beginners eventually need. Tombacco is produced in Indonesia under the supervision of an international team spanning Germany, Russia, Ukraine, the Netherlands, and Indonesia — the production standard behind the steps below.
Quick Answer
Fill the base so the downstem sits under around 1 to 1.5 inches of water, then assemble the pipe and run a leak test. Pack the bowl loosely with tobacco, leaving a small gap below the rim. Cover it with foil or an HMD, light natural coconut coals until they’re fully red with grey ash, then place them on the bowl and let it preheat for 5 to 8 minutes before the first draw. Manage heat actively through the session by rotating the coals roughly every 20 minutes.
What You Need for a Proper Shisha Setup
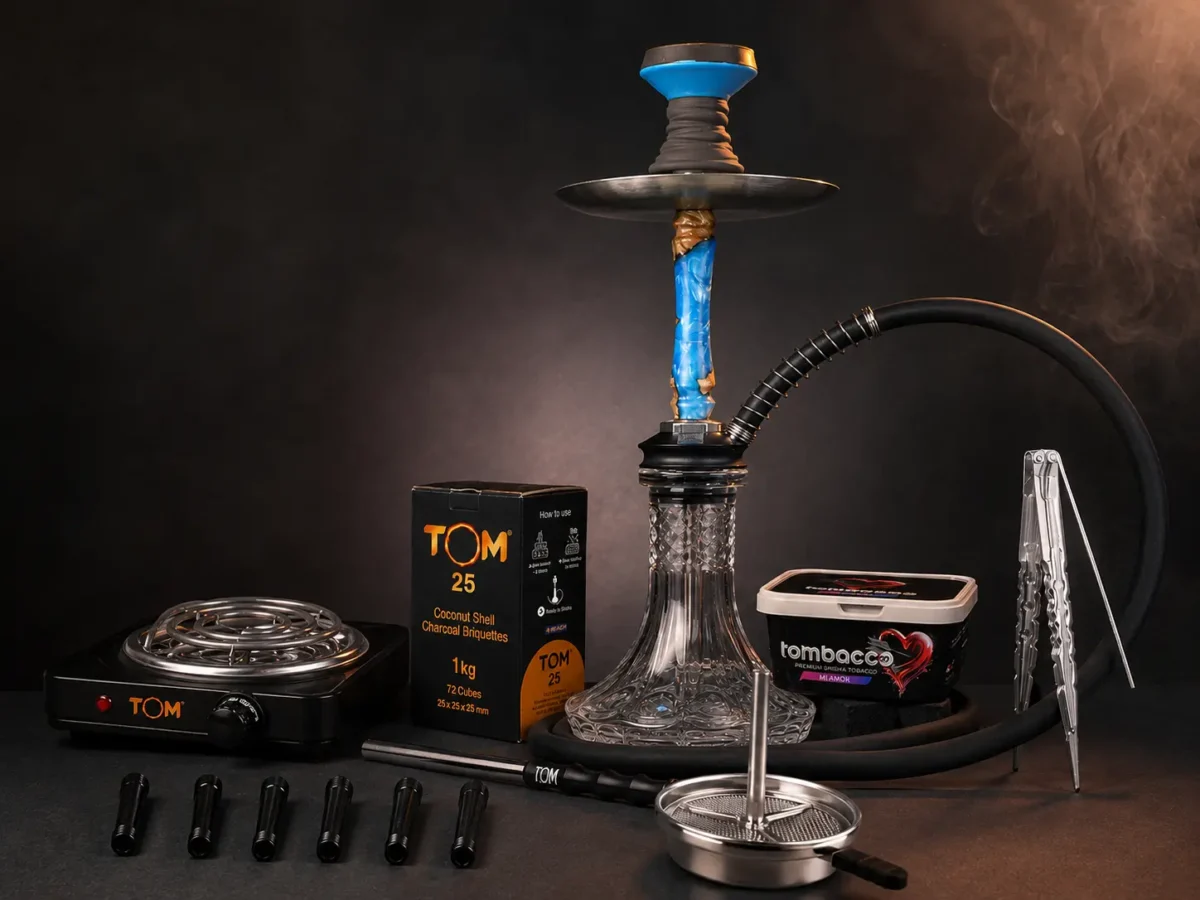
Before lighting anything, gather the full setup. Missing a single grommet or using the wrong coal type is the most common reason a first session goes wrong.
- Hookah pipe – base, stem, tray, and hose
- Bowl – Classic or Phunnel style
- Grommets – rubber or silicone seals for airtight connections
- Shisha tobacco – Whiteline, Blackline, or Herbal
- Heavy-duty foil or a Heat Management Device (HMD)
- Natural coconut coals – not quick-light
- Metal tongs
- Knife and cutting board – for trimming oversized tobacco leaf pieces
- Needle or pick – for levelling tobacco once it’s in the bowl
For a first bowl, Tombacco Whiteline is the natural starting point — a washed Virginia tobacco line built for a milder, more approachable session. Anyone still deciding between a tobacco base and a nicotine-free option can work through the full comparison in Tombacco’s herbal or tobacco shisha guide before picking a line. A well-prepared session generally runs 60 to 90 minutes.
Clean Before You Start
A hookah that wasn’t rinsed after its last session carries old residue into the new one, usually as a lingering ghosting flavour or a slightly stale smell in the base. Give the stem, base, and bowl a quick rinse with warm water before assembling anything, especially if the hookah has been sitting unused for a while.
This is also a good moment to check the grommets for wear or cracking — a perished seal is one of the most common reasons the leak test in Step 2 fails.
Step 1: Set the Water Level in the Base
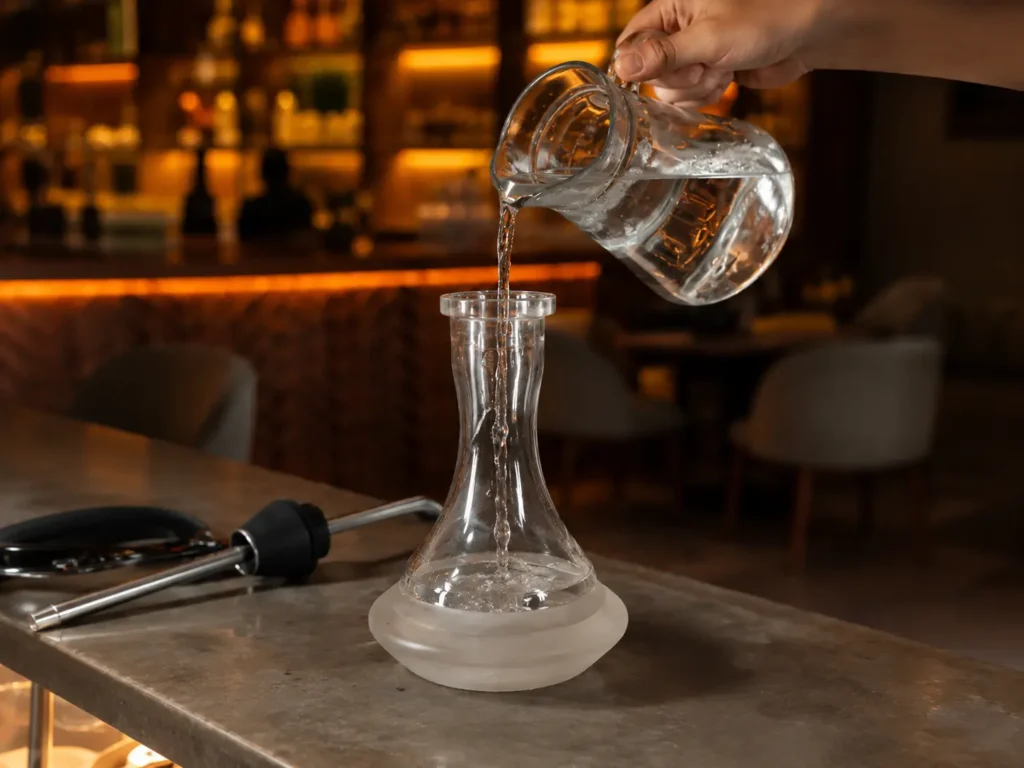
Fill the base with cold water. As a general starting point, submerge the downstem by around 1 to 1.5 inches, then adjust based on the hookah’s design and airflow — stem length, base shape, and bowl style all shift where that sweet spot actually sits.
Too little water tends to send the smoke through with less filtration, arriving harsher and hotter. Too much can restrict airflow through the downstem, making the draw feel heavy. Use the 1 to 1.5-inch range as a starting point, then fine-tune based on how the draw feels.
Step 2: Assemble the Pipe and Run the Leak Test
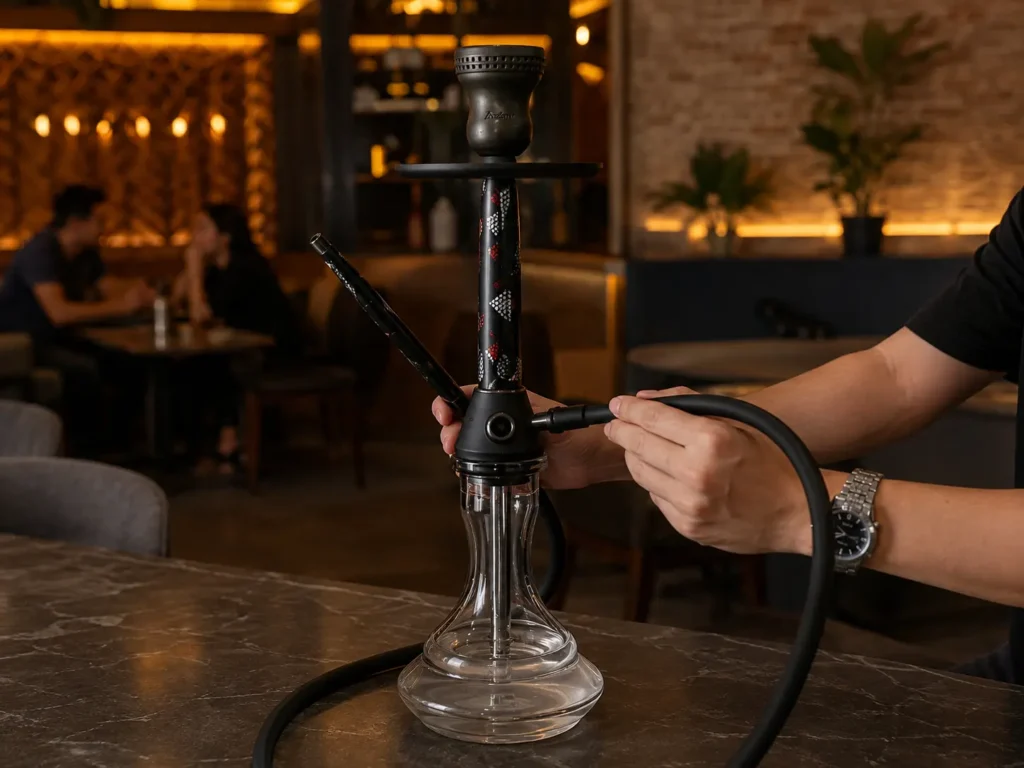
Connect the stem to the base using a grommet, attach the tray below the bowl seat, and fit the hose into its port. Every connection needs to be airtight — a single loose grommet is enough to ruin an otherwise perfect pack and heat setup.
Before adding tobacco or coals, run the leak test: cover the open top of the stem with one hand and draw through the hose. If air pulls through easily, a grommet is loose or missing. Fixing it now saves a wasted bowl of tobacco later.
Step 3: Prepare and Pack the Shisha Tobacco
Stir Before Packing
Stir the tobacco gently before packing to redistribute the flavouring and moisture throughout the mix, since molasses and glycerin can settle toward the bottom of the packaging during storage.
Glycerin is the ingredient largely responsible for shisha’s visible clouds — it vaporises under heat, while molasses carries most of the flavour and helps keep the leaf moist through the session.
How Much Tobacco to Use
The right amount depends on bowl size, not a fixed weight — a small bowl and a large bowl need noticeably different quantities to fill correctly. As a general starting point, around 20 grams works for a standard-size bowl; adjust up for a larger bowl or down for a smaller one, and add enough to loosely fill the bowl up to the rim gap without compacting it under its own weight.
Visible empty space at the sides usually means more tobacco is needed. Tobacco that’s already pressing against the sides or mounding above the rim gap means there’s too much in the bowl.
Use the Fluff Pack Method
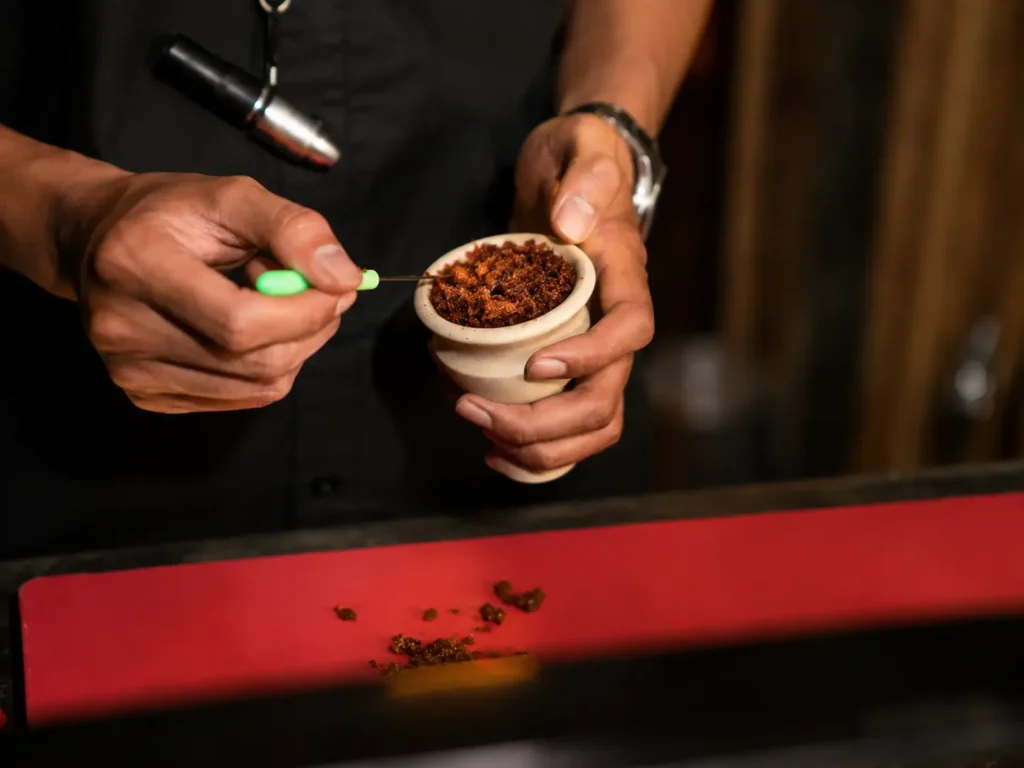
Sprinkle the tobacco into the bowl loosely, using fingers rather than a spoon, and never press it down. If any leaf pieces are too large, trim them down with a knife on a cutting board first — oversized pieces pack unevenly and leave gaps in the airflow. Airflow needs to pass between the strands of leaf, not through a compressed block.
Once the tobacco is in the bowl, use a needle or pick to gently level the surface, smoothing out high spots without compacting the leaf. On an Egyptian or traditional bowl, also clear the centre hole afterward to stop it clogging.
Pack density is one of several factors — alongside bowl shape, tobacco line, and heat — that shapes how a session actually feels. Tombacco’s guide to managing nicotine level in shisha covers how these variables interact in more depth.
Leave the Rim Gap
The right gap depends on what’s covering the bowl. With an HMD, keep the tobacco around 1 to 2 mm below the rim — an HMD spreads heat evenly across the whole surface, so direct contact burns the tobacco almost immediately. With foil, a very slight touch is fine, since foil delivers heat as point heating through the punched holes directly above the leaf, and a touch of contact helps that heat transfer down into the tobacco instead of staying trapped at the surface.
Anyone experimenting with blending Whiteline and Blackline for a custom strength or flavour profile can find ratio guidance in Tombacco’s mixology guide.
Step 4: Seal the Bowl With Foil or an HMD
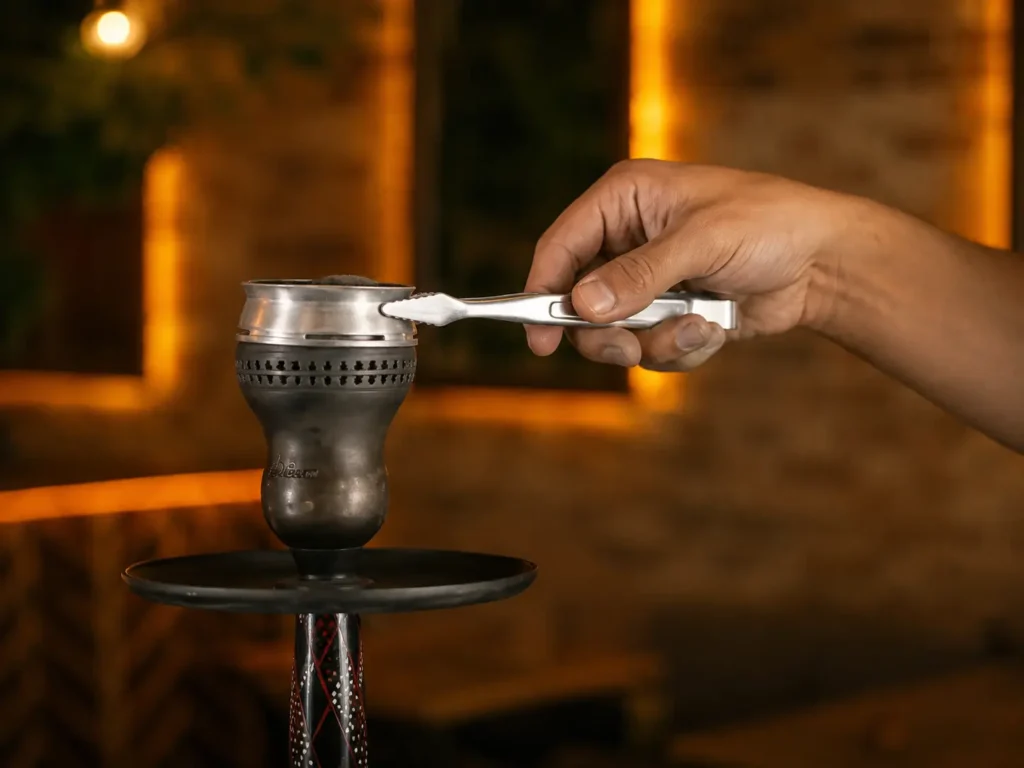
For foil: use heavy-duty aluminium foil, pull it drum-tight across the bowl so there’s no sag, and secure it around the rim. Poke small, evenly spaced holes starting from the outer edge and spiralling inward, leaving the very centre clear.
For a Heat Management Device, simply set it on top of the bowl. An HMD holds heat more evenly than foil and removes the need to manage a hole-punching pattern altogether — a straightforward upgrade for anyone smoking regularly.
Step 5: Light and Position the Charcoal
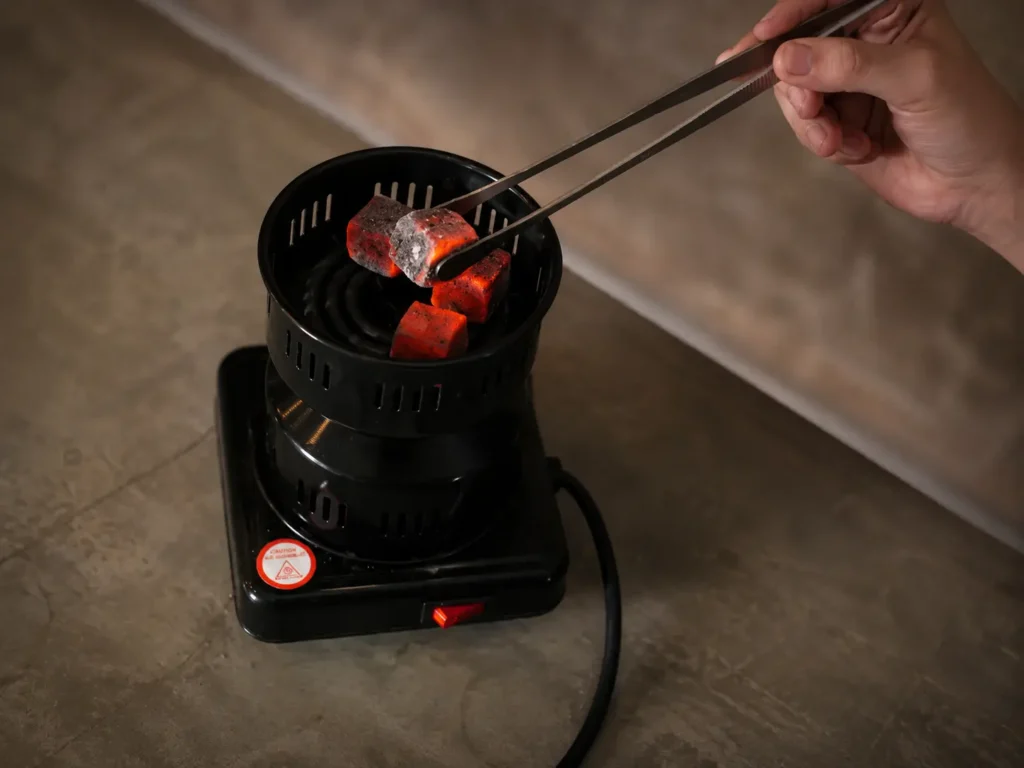
Light 3 to 4 natural coconut coals on a stove or dedicated burner. Wait until they glow red and are covered in a light grey ash, which usually takes around 8 minutes. Avoid placing coals on the bowl before they’re fully lit — incomplete combustion increases carbon monoxide production and can leave a noticeably foul taste in the smoke.
Natural coconut coals are worth the extra few minutes over quick-light charcoal, which ignites fast but burns unevenly and often carries a chemical taste into the smoke. Tombacco’s guide to choosing safe, high-quality hookah charcoal covers cube sizing and what to check before committing a full session to a new batch.
Coal placement matters more with foil than with an HMD. Foil transfers heat through the punched holes directly beneath the coal — a form of point heating — so where the coal sits changes how the bowl cooks: start it around the outer edge of the bowl rather than directly over the centre, then adjust based on the heat. An HMD distributes heat evenly across the whole bowl, so the coal can generally sit anywhere on top of it.
Either way, let the bowl preheat for 5 to 8 minutes before the first draw.
How to Manage Heat During a Shisha Session
Heat management doesn’t stop once the coals are placed — it’s an active part of the session, not a one-time setup step.
Draw slowly and steadily rather than pulling hard. A hard, fast pull drags air straight past the coals through the shortest path in the bowl, overheating a narrow channel of tobacco while the rest barely cooks. Slow, even draws spread that airflow across more of the packed leaf.
Roughly every 20 minutes, tap the ash off the coals and rotate them to a fresh spot on the bowl. This prevents localised hot spots that would otherwise scorch the tobacco directly underneath a coal that’s sat in one place too long.
Tombacco Tip: If the flavour turns harsh early in a session, remove the coals briefly and blow through the hose to cool the tobacco down before adding more charcoal. Excess heat is usually easier to fix this way than by changing the tobacco.
Troubleshooting: Fixing Harsh, Weak, or Restricted Smoke
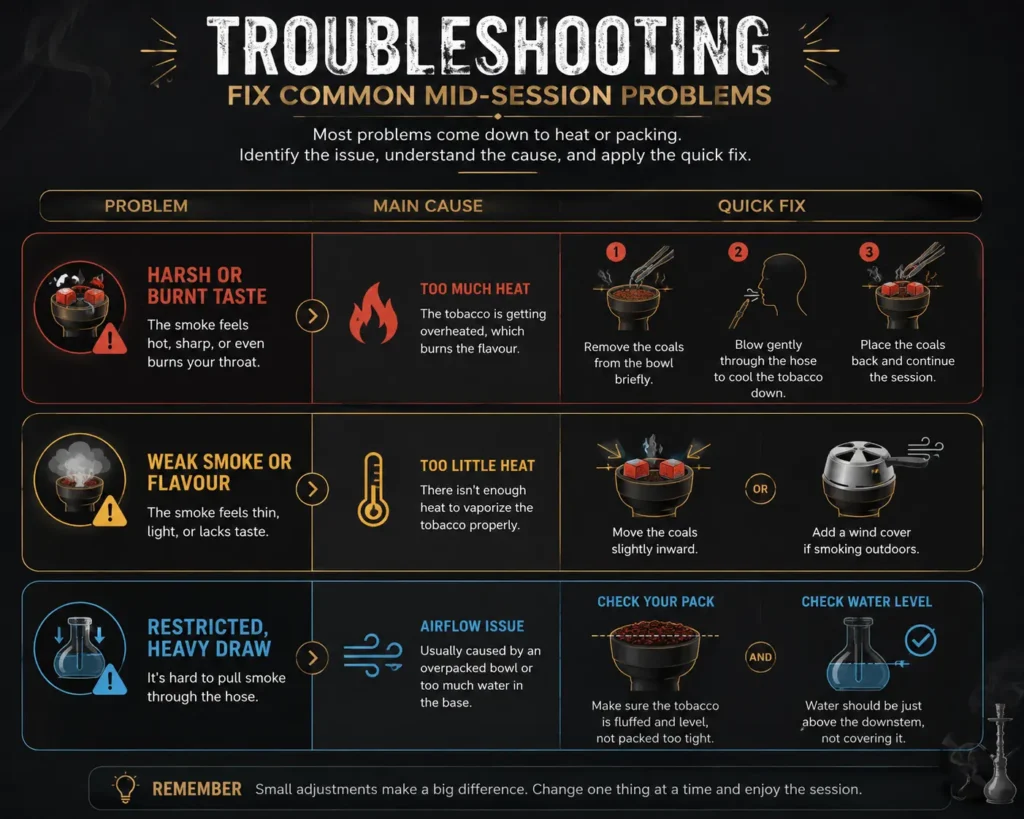
Most mid-session problems trace back to one of three causes, and each has a direct fix.
- Harsh or burnt taste – Too much heat. Remove the coals from the bowl briefly, blow gently through the hose to cool the tobacco down, then place the coals back and continue the session.
- Weak smoke or flavour – Too little heat. Move the coals slightly inward, or add a wind cover if smoking outdoors.
- Restricted, heavy draw – Usually an overpacked bowl or too much water in the base. Check both before adding more heat.
Common Beginner Mistakes
Most first sessions go wrong for one of a handful of repeat reasons, all covered above:
- Skipping the leak test and only discovering a loose grommet after the bowl is packed.
- Overpacking the bowl instead of using the fluff pack method, which blocks airflow.
- Guessing the water level instead of using the 1 to 1.5-inch range as a starting point.
- Using quick-light coals indoors instead of natural coconut coals.
- Placing coals before they’re fully lit, which increases carbon monoxide and leaves a foul taste.
- Pulling hard and fast instead of drawing slowly and steadily.
- Skipping the pre-setup rinse, letting ghosting flavour carry into a fresh bowl.
Post-Session Care: Cleaning and Preventing Ghosting
Once the coals have fully cooled, dispose of the ash safely and rinse the base, stem, and bowl with warm water. Residue left in the pipe leads to ghosting, where old flavour lingers and bleeds into the next session regardless of what fresh tobacco goes into the bowl.
A quick rinse after every session is far easier than the deep clean needed once ghosting has properly set in.
Shisha Safety Essentials
- Always handle hot coals with metal tongs, never bare hands.
- Use charcoal only in a well-ventilated area, and follow the charcoal manufacturer’s safety instructions.
- Let coals fully ignite before placing them on the bowl — incomplete combustion of any charcoal increases carbon monoxide production.
- Drink water throughout the session, since a long smoke can be dehydrating.
Preparing Shisha Correctly, Every Time
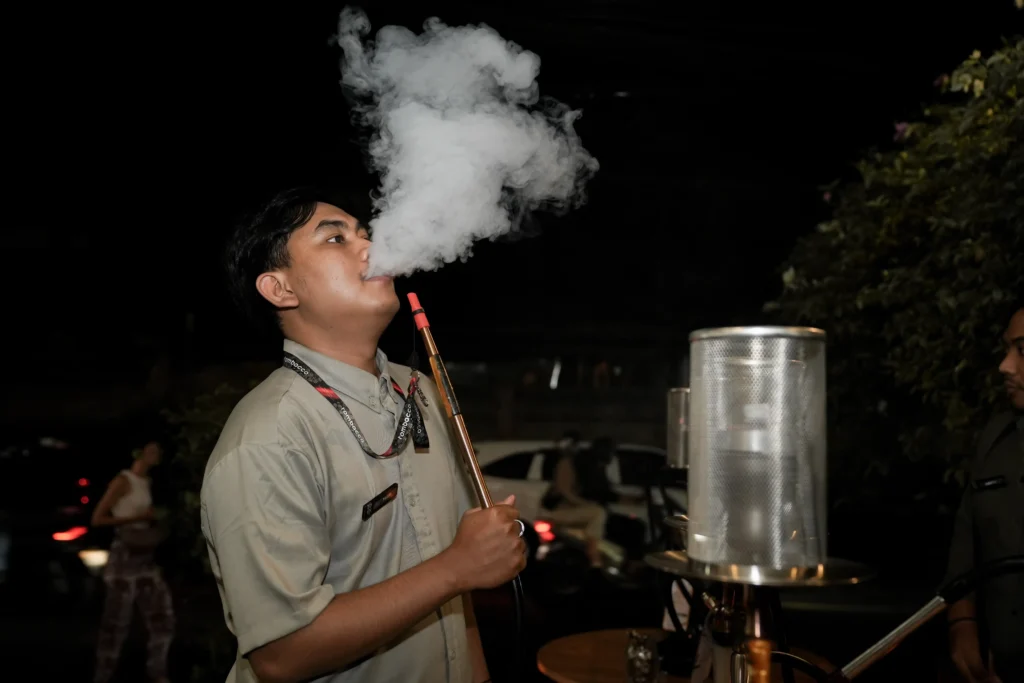
Once the water level, the leak test, the fluff pack, and active heat management become routine, the trial-and-error that trips up most beginners mostly disappears. How to prepare shisha well is less about any single step and more about running all of them in the right order, every time.
Tombacco’s full range — Whiteline, Blackline, and Herbal — is produced in Indonesia under international supervision, giving every session a consistent starting point to build good technique on. Browse Tombacco’s full range of shisha tobacco to find the right line for the next session.
Frequently Asked Questions
How much water should go in a shisha base? Around 1 to 1.5 inches above the downstem is a good starting point, though the ideal depth varies with the hookah’s design. Adjust from there based on how the draw feels.
How much shisha tobacco should I put in a bowl? Around 20 grams as a general starting point for a standard-size bowl, adjusted up or down depending on the bowl’s size. Fill loosely up to the rim gap without compacting the tobacco — visible gaps mean more is needed, while tobacco pressing against the sides means there’s too much.
How long should I heat shisha before smoking? Light the coals until they glow red and are covered in grey ash, which usually takes around 8 minutes, then let them sit on the bowl for a further 5 to 8 minutes so the tobacco can preheat before the first draw.
Why does my shisha taste harsh? Most often an overpacked bowl, tobacco touching the foil or HMD, or too much heat. If it happens mid-session, remove the coals briefly and blow through the hose to cool the tobacco down before placing the coals back — usually enough to fix it without a full repack.
Should I use natural coals or quick-light coals? Natural coconut coals are generally preferred. They tend to burn more evenly and last longer, with less risk of a chemical taste carrying into the smoke.
Which Tombacco line should a beginner start with? Whiteline, Tombacco’s washed Virginia line, for a milder, more approachable first session. Tombacco’s nicotine management guide breaks down how Whiteline, Blackline, and Herbal compare.
How do I check my setup is airtight before adding coals? Cover the top of the stem with a hand and draw through the hose. If air pulls through freely, check the grommets before packing the bowl.